
LED Flood Lights: Complete Commercial Lighting Guide 2026
Commercial LED flood lights can reduce outdoor lighting energy costs by up to 70% while delivering superior illumination for security, safety, and aesthetics.
This comprehensive guide covers everything you need to know about selecting and installing LED flood lights for commercial applications, from parking lots and sports fields to building facades and security perimeters.
1. Understanding LED Flood Light Specifications
LED flood lights are directional lighting fixtures designed to illuminate large outdoor areas. Unlike area lights that provide 360-degree coverage, flood lights focus light in specific directions with adjustable angles. Key specifications include wattage (typically 50W-1000W for commercial applications), lumens (light output), beam angle (narrow 15-30° for spotlighting, wide 60-120° for area coverage), IP rating (weather protection), and color temperature. For commercial use, expect 120-150 lumens per watt efficiency from quality fixtures. A 300W LED flood light produces approximately 40,000-45,000 lumens, equivalent to a 1000W metal halide fixture. This dramatic efficiency gain is why LED flood lights have become the standard for new installations and retrofits.
- 50W-1000W range for commercial applications
- 120-150 lm/W efficiency from quality fixtures
- Beam angles from 15° (spot) to 120° (wide flood)
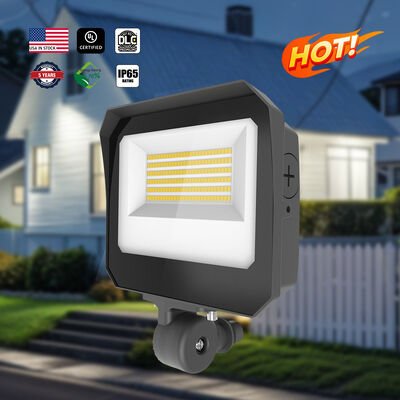
- IP65 minimum for outdoor use, IP66 for harsh environments
- 300W LED = 1000W metal halide equivalent
2. Wattage and Lumens: Sizing Your Flood Lights
Proper sizing ensures adequate illumination without wasted energy. For building facades, calculate 5-15 lumens per square foot depending on desired brightness. Parking lots need 10-20 foot-candles (100-200 lux) for safety and security. Sports fields require 200-1500 lux depending on level of play. Here’s a sizing guide: **Small Areas** (under 5,000 sq ft): 100W-200W fixtures. **Medium Areas** (5,000-20,000 sq ft): 200W-400W fixtures. **Large Areas** (20,000+ sq ft): 400W-1000W fixtures or multiple smaller units. Always consider mounting height. Fixtures at 20 feet need 30% more lumens than fixtures at 15 feet for equivalent ground-level brightness. Use an IES file and lighting calculation software for precise planning on major installations.
- Building facades: 5-15 lumens/sq ft
- Parking lots: 100-200 lux for safety
- Sports fields: 200-1500 lux by competition level
- Higher mounting = more lumens needed
- Use IES files for precise calculations
3. IP Ratings and Weather Protection
IP (Ingress Protection) ratings determine how well fixtures withstand environmental conditions. For outdoor flood lights, IP65 is the minimum acceptable rating, providing complete dust protection and resistance against water jets from any direction. IP66 offers stronger water jet protection, ideal for areas exposed to pressure washing or heavy rain. IP67 allows temporary immersion, necessary for flood-prone locations. Consider your climate: Coastal areas need marine-grade fixtures with enhanced corrosion resistance. Areas with extreme temperature swings require fixtures rated for the full expected range (-30°C to +50°C typical). Cold climates benefit from LED’s instant-on capability—no warm-up time in freezing temperatures unlike metal halide. UV-resistant lenses and housings prevent degradation in sunny climates.
- IP65 minimum for outdoor applications
- IP66 for pressure washing exposure
- IP67 for flood-prone areas
- Marine-grade for coastal installations
- LED works instantly in cold weather
4. Beam Angle Selection and Light Distribution
If the project also requires wall packs, canopy lights, high bays or area lighting, review the full HAROLUX commercial lighting product range for factory-direct B2B options.
Beam angle determines how light spreads from the fixture. **Narrow Beam (15-30°)** concentrates light for long-throw applications like flagpoles, monuments, or distant building features. Provides intense illumination on small areas from far away. **Medium Beam (30-60°)** balances throw distance and coverage. Ideal for general building facades, signage, and medium-distance applications. **Wide Beam (60-120°)** spreads light over large areas close to the fixture. Best for parking lots, loading docks, and area lighting. For uniform coverage, overlap beam patterns by 30-50%. Multiple fixtures with overlapping beams eliminate dark spots and create even illumination. Adjustable knuckles allow fine-tuning of aim angle after installation. Consider asymmetric distribution for perimeter lighting where light should project outward rather than backward toward the building.
- Narrow (15-30°): Long throw, focused illumination
- Medium (30-60°): General facade and signage
- Wide (60-120°): Area and parking lot lighting
- Overlap beams 30-50% for uniform coverage
- Adjustable knuckles for precise aiming
5. Color Temperature and CRI Considerations
Color temperature significantly impacts visual perception and security. **4000K (Neutral White)** provides natural appearance, suitable for residential areas and mixed-use developments where harsh white light would cause complaints. **5000K (Daylight)** is the most popular choice for commercial and industrial applications. It enhances visibility, creates alert environments, and improves security camera performance. **6000K+ (Cool White)** delivers maximum brightness perception, ideal for security-focused applications where deterrence is the goal. For security cameras, 5000K-6000K matches camera sensitivity curves for best image quality. Higher CRI (Color Rendering Index) becomes important for retail exteriors, car dealerships, and any application where color accuracy affects customer perception. CRI 70 is standard, CRI 80+ recommended for retail, and CRI 90+ for auto dealerships.
- 4000K: Residential and mixed-use areas
- 5000K: Standard for commercial/industrial
- 6000K+: Maximum security and deterrence
- 5000K-6000K optimal for security cameras
- CRI 80+ for retail, 90+ for auto dealerships
6. Installation and Mounting Methods
Proper installation ensures performance and longevity. **Wall Mounting** suits building perimeters and facade lighting. Use appropriate anchors for wall material—concrete screws, expansion bolts, or lag bolts for masonry. **Pole Mounting** is standard for parking lots and open areas. Slip fitters mount to tenons on pole tops; trunnion mounts attach to pole sides. Consider pole height and wind load—larger fixtures may require heavier poles or guy wires. **Ground/Stake Mounting** works for landscape and accent lighting. Ensure below-grade connections are waterproof and protected from landscape maintenance equipment. For all installations: Use weatherproof junction boxes (IP66 rated). Apply dielectric grease to connections in corrosive environments. Install surge protection at the fixture and panel for outdoor circuits. Ground all metal fixtures per NEC requirements. Document wiring and fixture locations for future maintenance.
- Wall mount: Use appropriate anchors for substrate
- Pole mount: Consider wind load and fixture weight
- Ground mount: Waterproof below-grade connections
- Install surge protection for outdoor circuits
- Ground all metal fixtures per NEC